How to Build an Apron Driveway: Materials & Depth Guide
A well-built apron driveway is the critical transition that protects your main driveway and enhances your home's curb appeal. This guide explains what an apron driveway is, which materials are best suited for it, how to prepare the ground and lay the foundation, how to install it step by step for durability, and how to estimate the amount of gravel required. Whether you are connecting a new driveway to the street or replacing a worn-out existing apron, use the sections below to navigate through the process.
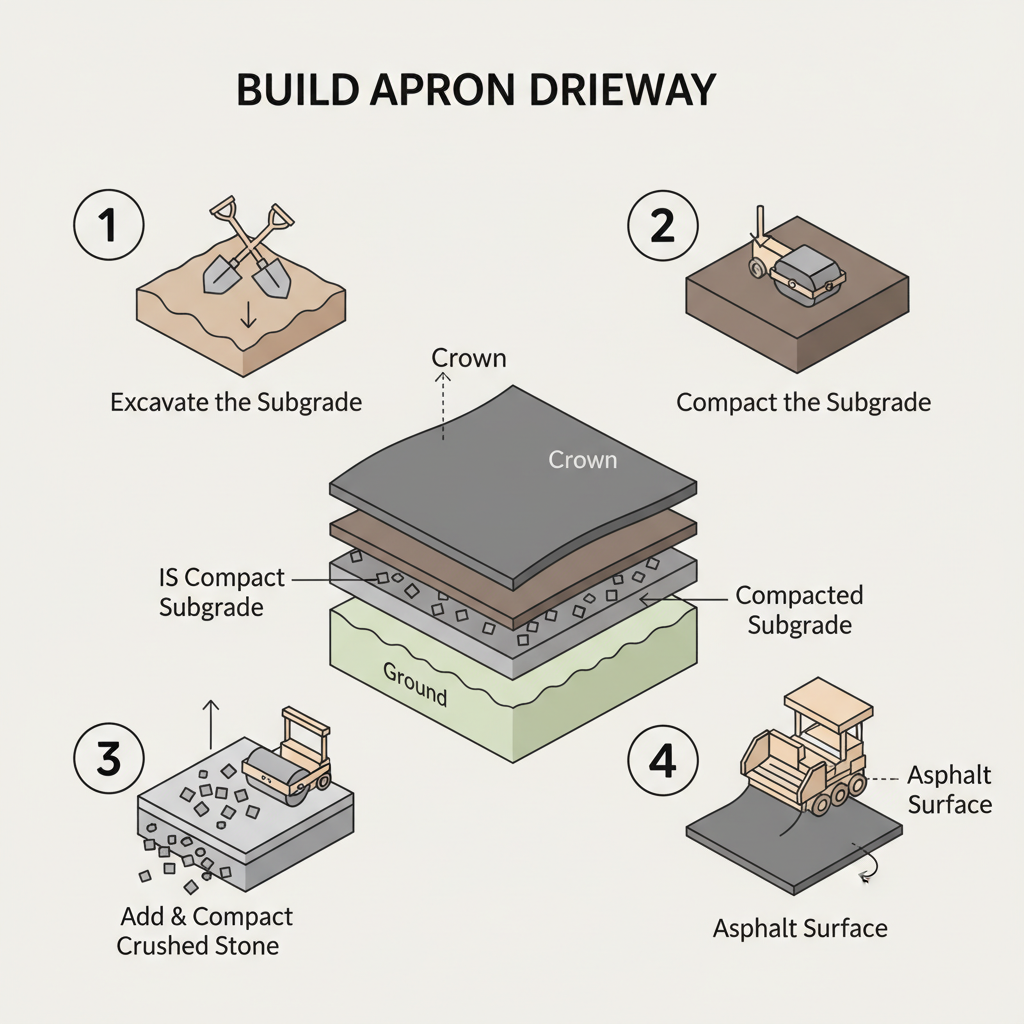
See How to Build an Apron Driveway
This visual guide walks you through the complete apron driveway installation sequence, from excavation to final asphalt surfacing. It clearly illustrates each numbered step and shows the layered structure from ground up, helping you understand how each component contributes to a durable, properly crowned driveway that sheds water effectively.
Apron Driveway Materials: Best Base, Surface & Installation Guide
An apron driveway requires a multi-layer system to handle vehicle turning loads and weather exposure. We recommend crushed stone as the base material with 3/4 inch grading for optimal compaction and drainage. Install at 8-12 inches total depth with proper crown to direct water away from structures. This approach ensures long-term stability and prevents erosion or settlement issues.
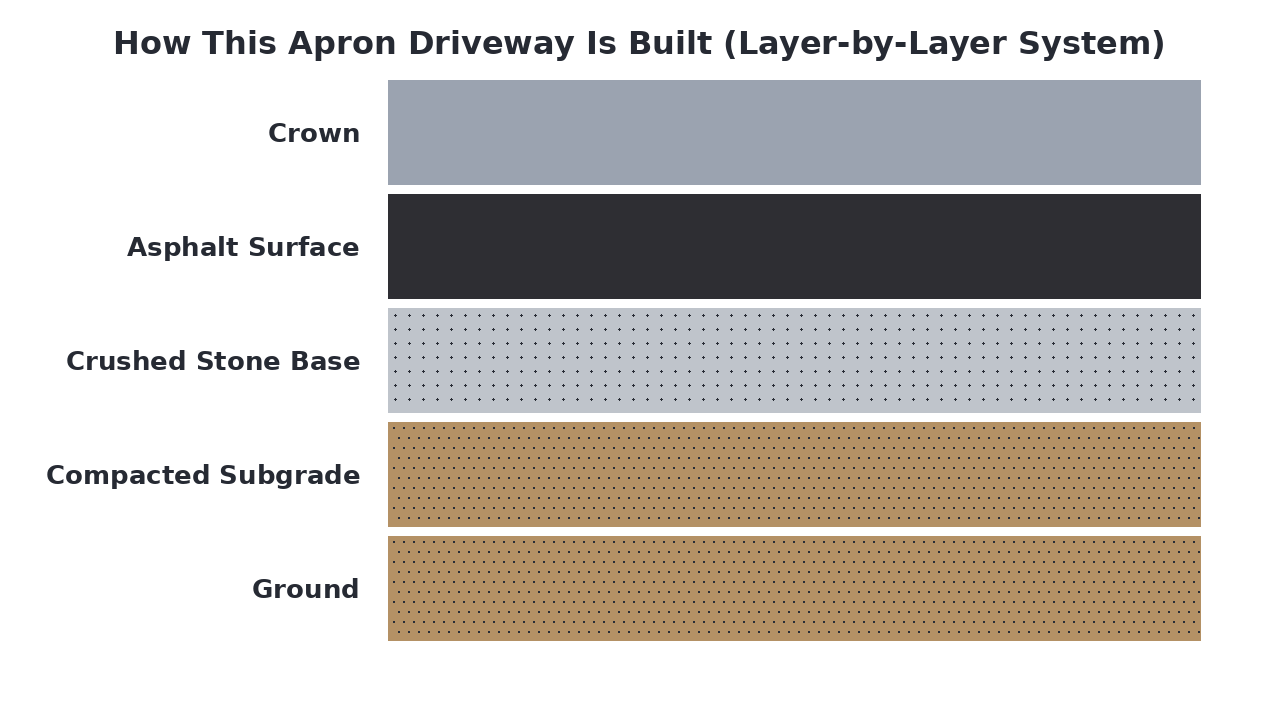
How This Apron Driveway Is Built (Layer-by-Layer System)
An apron driveway is constructed as a multi-layer system designed to handle vehicle turning loads and withstand weather exposure. The structure begins with a stable subgrade, followed by a compacted base layer that provides load-bearing capacity, and a durable surface layer that creates a smooth driving area. Proper installation includes a slight crown or slope to direct water away from garage doors and foundation walls, ensuring longevity and preventing erosion or settlement issues.
Materials Breakdown: What Each Layer Does
An apron driveway is constructed as a layered system where each material serves a distinct structural purpose. The layers work together to distribute vehicle loads, shed water, and prevent shifting or cracking over time. Choosing the right product for each layer ensures a durable, long-lasting surface that can handle daily traffic.
Native Soil
The existing earth beneath the driveway; it must be stable and properly graded to provide a solid foundation for the layers above.
Compacted Subgrade
A layer of native soil or select fill that is mechanically compacted to create a firm, uniform base that resists settling.
Crushed Stone
A dense, angular stone layer that provides load-bearing support, improves drainage, and prevents frost heave in colder climates.
View Crushed Stone →Asphalt
The top wearing course that creates a smooth, waterproof driving surface capable of withstanding vehicle traffic and weathering.
View Asphalt →Surface Crown
A slight upward curve in the center of the driveway that directs rainwater to the sides, preventing pooling and prolonging the life of the asphalt.
What Is an Apron Driveway and Why Does It Matter?
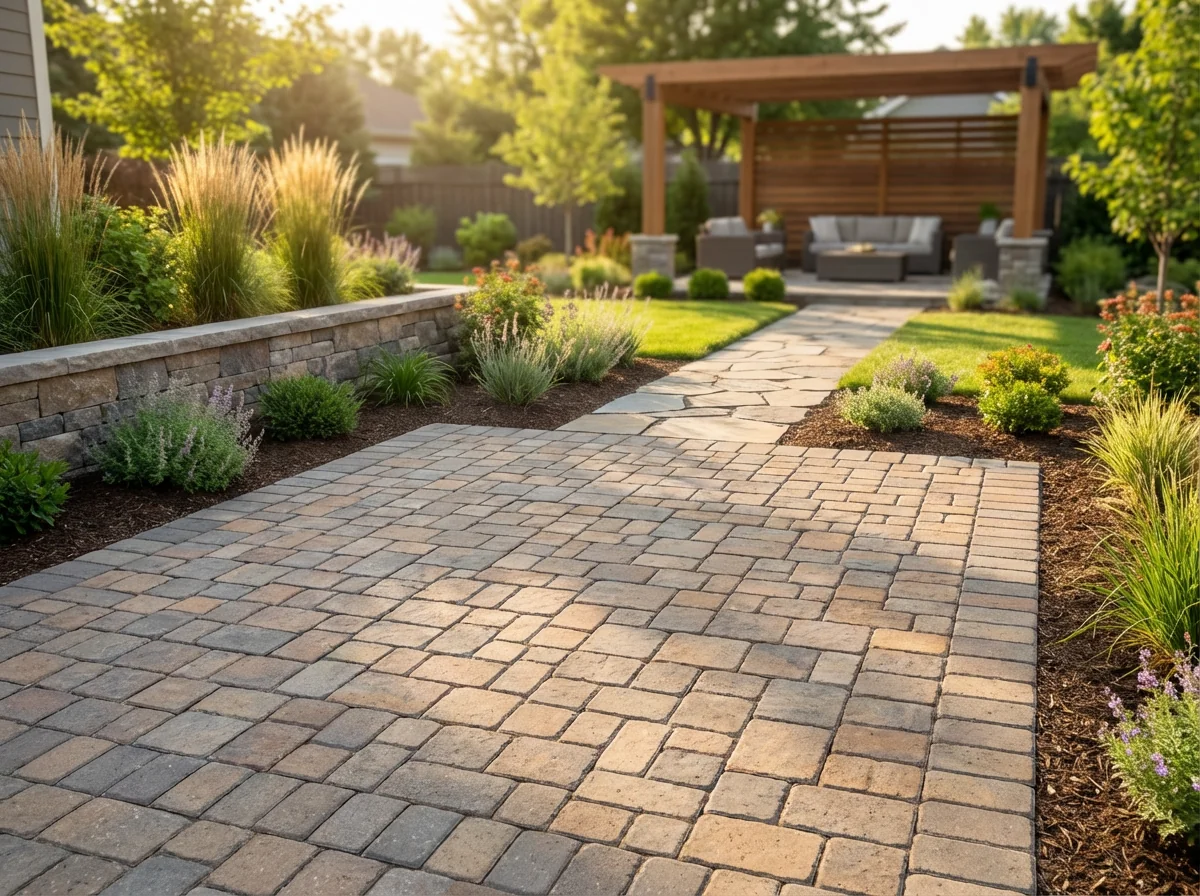
An apron driveway is the paved transition area between a garage and the main driveway, designed to handle the stress of turning vehicles and frequent stopping. This specialized section matters because it protects your garage foundation from water damage and provides a stable surface for vehicles to maneuver. Unlike standard driveways, apron driveways require enhanced structural reinforcement to withstand concentrated turning forces and prevent cracking or settlement. Proper installation with adequate base material and drainage slope is essential for longevity and preventing water infiltration into garage areas.
Common Types of Apron Driveway Systems
Apron driveways come in several common materials, each with different strengths and trade-offs. Concrete provides maximum durability and load capacity but requires professional installation. Asphalt offers good flexibility and weather resistance with moderate cost. Gravel systems are budget-friendly and provide excellent drainage, while pavers offer aesthetic customization with interlocking stability.
- Maximum durability and strength
- Highest load capacity
- Professional installation required
- Higher upfront cost
Best for:Heavy vehicle traffic and permanent solutions
- Good flexibility and weather resistance
- Moderate installation cost
- Smooth driving surface
- Requires periodic sealing
Best for:Cold climates and moderate budgets
- Excellent natural drainage
- Budget-friendly installation
- Easy DIY maintenance
- Permeable surface
Best for:Drainage concerns and tight budgets
- Aesthetic customization options
- Interlocking stability
- Easy individual replacement
- Higher material cost
Best for:Design-focused homeowners with higher budgets
When an Apron Driveway Is the Best Solution
A gravel apron driveway is ideal when drainage is a primary concern, as its permeable nature prevents water pooling near your garage foundation. It's perfect for homeowners on tight budgets who need a functional transition area without major construction costs. Gravel also works well for DIY enthusiasts who want to handle installation and maintenance themselves, and for properties where vehicle traffic is moderate rather than heavy commercial use.
Everything You Need to Build an Apron Driveway
Building an apron driveway requires specific materials for each structural layer and the right tools to prepare and install them. You'll need foundational materials like crushed stone for the base and asphalt for the surface, along with tools for excavation, grading, and compaction. Proper materials and equipment ensure a durable, load-bearing driveway that sheds water effectively.
- Compacted subgrade, Crushed stone base, Asphalt surface
- Shovel, Rake, Plate compactor, Grading tools, Asphalt roller
- Hello Gravel (materials), Equipment rental (compactor, roller), A contractor supply store
What to Consider Before You Start
Before breaking ground, consider these key planning steps to ensure your apron driveway project is successful and compliant.
- Local regulations and permits
Check with your municipality for any required permits or zoning restrictions for driveway construction.
- Soil conditions and drainage
Assess your soil type and drainage patterns to determine if additional base preparation is needed.
- Driveway dimensions and layout
Measure and mark the exact area for your apron, ensuring proper width, length, and slope for water runoff.
- Material quantity calculation
Calculate the volume of crushed stone and asphalt needed based on your driveway dimensions and layer thicknesses.
- Utility line locations
Contact your local utility company to mark any underground lines before excavation begins.
How to Prepare the Ground for an Apron Driveway
Start by clearing the area of all vegetation, debris, and topsoil to expose the stable subgrade. Accurately mark the driveway boundaries and use a string level or laser level to establish the proper grade, ensuring a slope of at least 1% away from any structures for drainage. Excavate the marked area to the required depth, then thoroughly compact the exposed subgrade with a plate compactor to create a firm, unyielding foundation that will prevent future settling.
How an Apron Driveway Works
An apron driveway functions as a multi-layered system designed to manage weight and water. The compacted subgrade provides a stable platform, while the crushed stone base acts as a load-bearing layer that distributes vehicle forces and facilitates subsurface drainage. The final asphalt surface seals the structure, with its engineered crown directing rainwater off to the sides to prevent pooling and protect the underlying materials from water damage.
How to Install an Apron Driveway
Excavate the Subgrade
Remove soil to the specified depth across the entire marked area to establish a level foundation.
Compact the Subgrade
Use a plate compactor or roller to densely compact the exposed earth, creating a solid, unyielding base.
Add & Compact Crushed Stone
Spread a layer of crushed stone aggregate evenly and compact it in lifts to form a stable, load-bearing base.
Apply Asphalt Surface
Place the hot asphalt mix, rake it to the proper thickness and crown, and compact it with a roller for a smooth finish.
Alternative Gravel Options for Apron Driveways
Homeowners have several aggregate options for constructing an apron driveway, each with different characteristics for load-bearing, drainage, and durability. Crushed stone provides excellent compaction and stability, while gravel offers good drainage but may shift under heavy loads. Asphalt and concrete are solid surfaces but require professional installation and are less permeable. For most apron driveways, crushed stone is the recommended choice because it interlocks tightly, resists rutting, and handles vehicle traffic effectively.
Best for structural stability and heavy vehicle loads due to its interlocking angular edges.
View Product →Provides good drainage but can shift and rut under frequent traffic without proper edging.
View Product →A smooth, durable surface option that requires professional installation and periodic sealing.
View Product →Offers a permanent, low-maintenance surface but is costly and prone to cracking in freeze-thaw cycles.
View Product →Decorative only; too loose and unstable for vehicle traffic, causing constant displacement.
View Product →Common Apron Driveway Mistakes (And How to Avoid Them)
Avoiding common errors during apron driveway construction ensures long-term durability and reduces maintenance headaches. These mistakes often stem from cutting corners on materials, drainage, or proper layering.
- Inadequate base layer
- Poor drainage planning
- No edge restraints
- Insufficient compaction
- Wrong aggregate size
How to Maintain an Apron Driveway
Regular maintenance keeps an apron driveway functional and attractive. Annually inspect for potholes or ruts, fill them with fresh aggregate, and compact thoroughly. Re-grade the surface to maintain a slight crown for water runoff, and clear any debris from drainage channels to prevent standing water. Top up loose gravel as needed to maintain a consistent depth and prevent base layer exposure.
Calculate How Much Gravel You Need
Enter Your Dimensions
Measure your project area and we'll calculate how much material you need.