Pond Gravel: River Rock & Pea Gravel Sizing for Liners
A properly built pond can transform your yard into a serene retreat, but its success depends on careful planning and the right materials. This guide explains what a pond is, which materials you need, how to design and install it step by step, how to maintain it, and how to estimate the amount of gravel required. Whether you are creating a small backyard water feature or a large, landscaped pond, use the sections below to jump to the information you need.
See How to Build a Pond
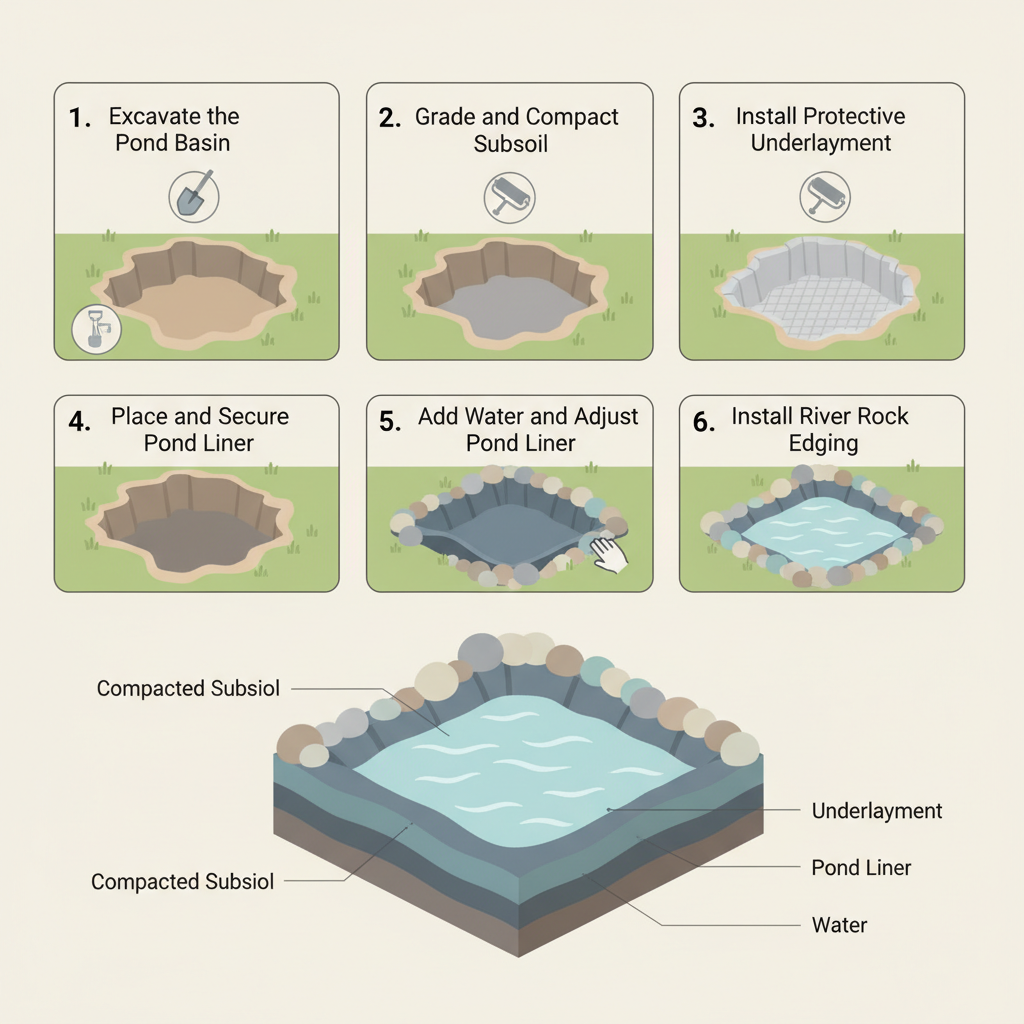
This visual guide breaks down the pond installation process into clear numbered steps and shows the essential layered structure from bottom to top. Seeing the sequence of excavation, liner placement, and finishing with river rock edging helps homeowners understand the proper order of operations. The cross-section diagram clarifies how each layer—from compacted subsoil to the final decorative border—contributes to a stable, long-lasting water feature.
Gravel for Ponds: Best Materials, Depth, Cost & How to Build
Building a pond requires careful layering to create a stable aquatic habitat that holds water effectively. River rock edging is the recommended choice for finishing the pond perimeter, with 1-3 inch smooth stones providing both natural aesthetics and practical UV protection for the liner. Install 4-6 inches of river rock around the edges to create a durable border that prevents erosion and complements the water feature. This approach ensures your pond remains watertight while looking natural in your landscape.
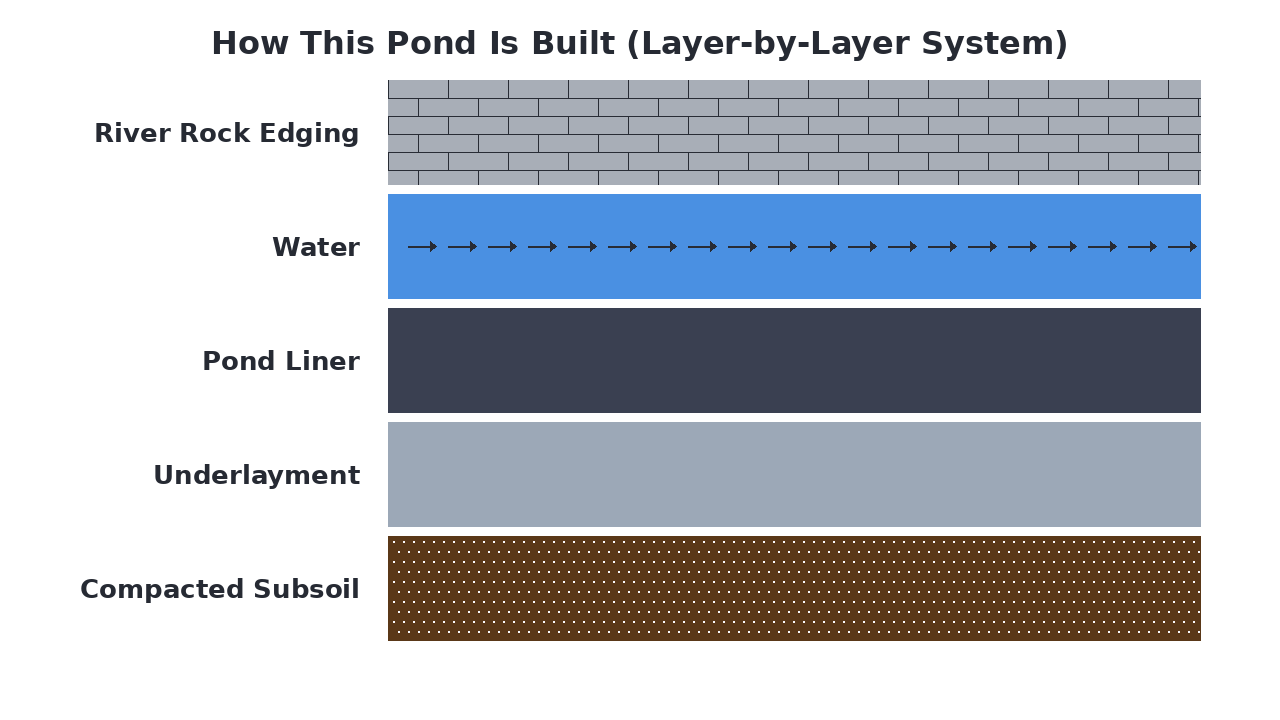
How This Pond Is Built (Layer-by-Layer System)
A pond is built as a layered system designed to hold water while creating a stable aquatic habitat. The system starts with a compacted subsoil base, followed by a protective underlayment and a flexible liner that forms the waterproof basin. The pond is then filled with water and finished with decorative boulders and river rock around the edges to create a natural appearance and protect the liner from UV damage.
Materials Breakdown: What Each Layer Does
A pond is constructed as a layered system, with each material serving a distinct purpose to create a stable, watertight, and attractive water feature. The layers work together to contain water, protect the liner from punctures, and provide a natural-looking edge. Choosing the appropriate product for each component ensures the pond remains durable and functions properly over time.
Compacted Subsoil
The stable, compacted native earth that forms the foundation of the pond excavation, preventing settling and providing a firm base for the liner.
Pond Underlayment Fabric
A protective geotextile layer placed over the subsoil to cushion the pond liner from sharp rocks and roots, preventing punctures.
EPDM Pond Liner
A flexible, waterproof membrane that forms the watertight seal of the pond, containing the water and preventing leaks.
Water
The pond's main element, held in place by the liner; it provides the aquatic environment for plants and wildlife.
River Rock
Decorative stones placed around the pond's perimeter to hide the liner edge, create a natural transition to the surrounding landscape, and prevent erosion.
View River Rock →What Is a Pond and Why Does It Matter?
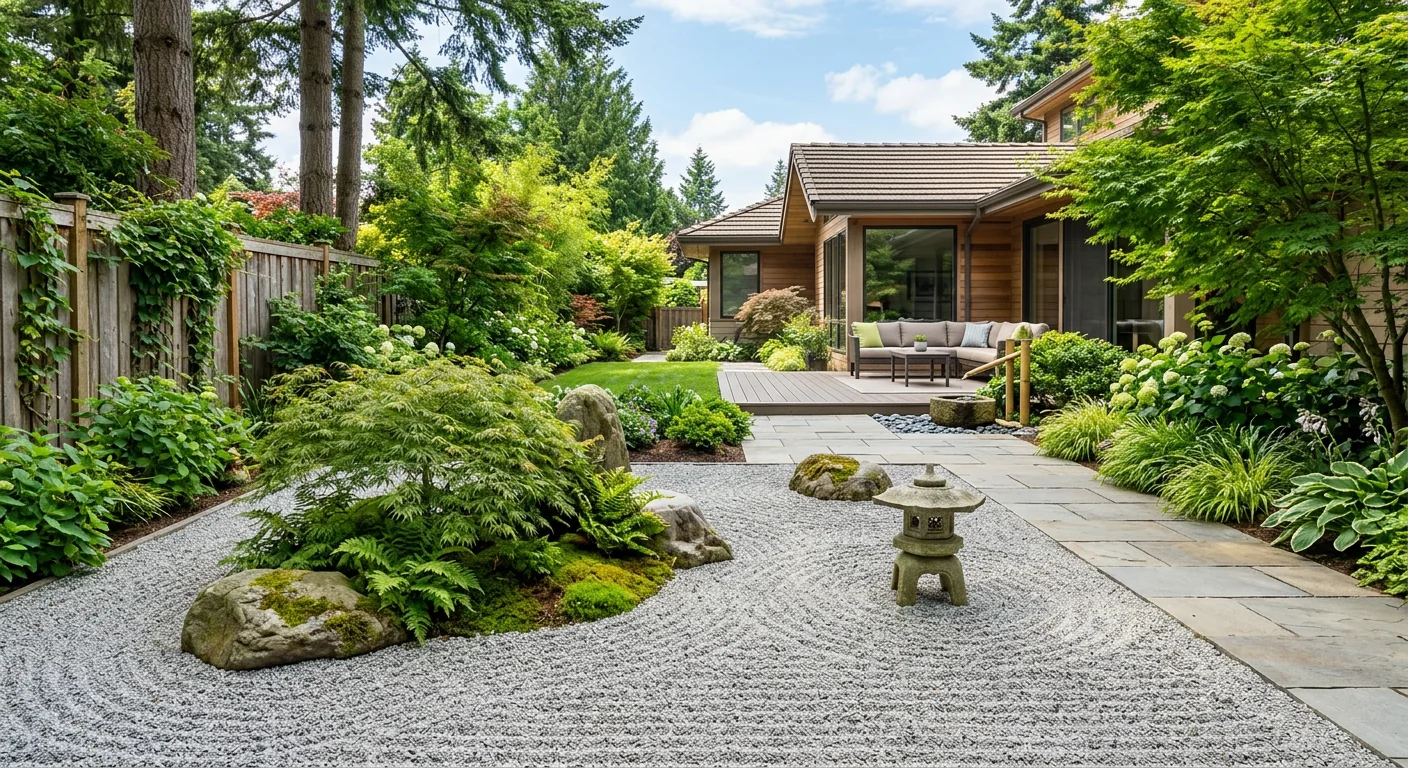
A pond is a constructed water feature designed to create a stable aquatic habitat in your landscape, serving both aesthetic and ecological purposes. It matters because it adds visual interest, supports local wildlife, and can help with stormwater management on your property. Unlike simple water gardens or fountains, a pond involves a complete layered system with waterproof lining and proper edging to maintain water integrity over time. This differs from temporary water features by creating a permanent, self-sustaining ecosystem that enhances your outdoor space for years to come.
Common Types of Pond Systems
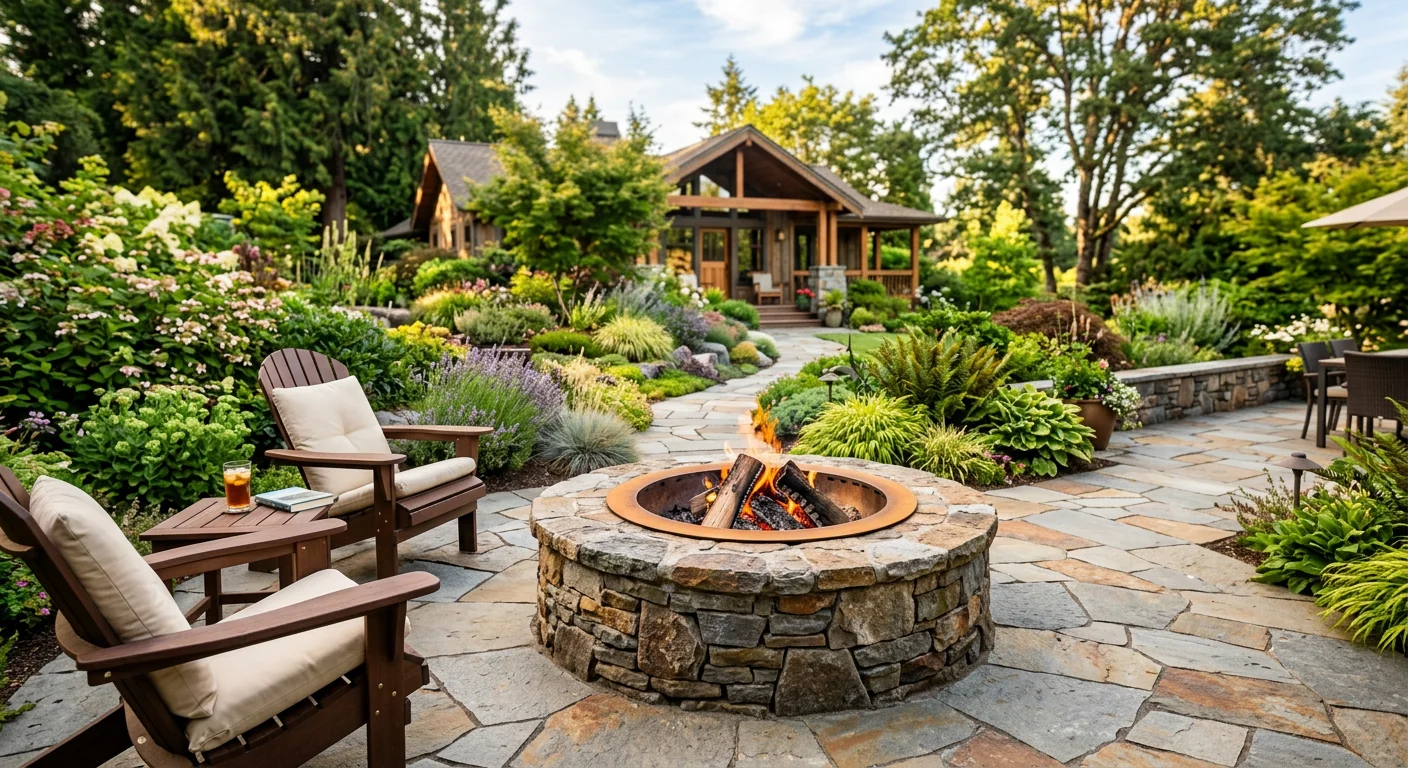
Pond systems vary based on their primary purpose and construction approach. Formal ponds feature geometric shapes and hard edging for a structured, architectural look, while natural ponds use irregular shapes and soft edges to blend seamlessly with the landscape. Koi ponds are specialized for fishkeeping with deep water and advanced filtration, whereas wildlife ponds are shallower and prioritize native habitat creation.
- Supports local ecosystems
- Low-maintenance native plants
- Attracts birds and pollinators
- Uses natural filtration
Best for:Creating backyard habitat and biodiversity
- Geometric, clean shapes
- Architectural focal point
- Often includes fountains
- Requires regular upkeep
Best for:Structured garden designs and visual impact
- Deep water for fish
- Advanced filtration systems
- Specialized fish care
- Higher initial investment
Best for:Dedicated fishkeeping enthusiasts
- Manages runoff water
- Larger scale construction
- Ecological benefits
- Municipal regulations apply
Best for:Property drainage and water management
When a Pond Is the Best Solution
A natural wildlife pond is ideal when you want to create a sustainable habitat that supports local biodiversity without intensive maintenance. It's perfect for homeowners who value ecological benefits over formal aesthetics and want to attract birds, pollinators, and amphibians to their yard. This approach works well with moderate budgets since it relies on natural filtration rather than expensive mechanical systems, making it a practical long-term solution for enhancing your landscape's ecological value.
Everything You Need to Build a Pond
Building a pond requires several key materials to create a stable, watertight structure and natural-looking edge. Essential supplies include a pond liner, protective underlayment, and edging materials like river rock. You'll also need basic excavation tools and a water source for filling the finished feature.
- Compacted subsoil, Underlayment, Pond liner, River rock, Sand (optional bedding)
- Shovel, Wheelbarrow, Level, Rubber mallet, Garden hose
- Hello Gravel (river rock, sand), A contractor supply store
What to Consider Before You Start
Proper planning is essential for a successful pond installation. Consider these key factors before you begin digging.
- Location and sunlight
Choose a spot with appropriate sunlight for any planned aquatic plants and away from tree roots.
- Local regulations and utilities
Check local building codes and call 811 to have underground utilities marked before excavation.
- Pond size and shape
Determine the desired dimensions and outline the shape with a garden hose or spray paint.
- Water source and drainage
Plan for convenient water access for filling and consider overflow drainage during heavy rain.
- Electrical needs
Decide if you'll need electricity for a pump, filter, or lighting and plan conduit routing.
How to Prepare the Ground for a Pond
Start by clearing the area of all vegetation, roots, and debris to create a clean work site. Mark the pond's outline using spray paint or a garden hose, then excavate the soil to the desired depth and shape, creating shelves for plants if desired. Grade the bottom and sides to ensure a smooth, even surface, then compact the subsoil thoroughly to prevent future settling and provide a stable foundation.
How a Pond Works
A pond functions as a layered, watertight basin where the compacted subsoil provides a stable base, preventing shifting and settling. The underlayment cushions and protects the pond liner from punctures by rocks or roots, while the liner itself creates an impermeable barrier that contains the water. River rock edging secures the liner at the perimeter, adds a natural aesthetic, and helps prevent soil erosion into the pond.
How to Install a Pond
Excavate the Pond Basin
Dig out the marked area to your desired depth and shape, creating shelves for aquatic plants if desired.
Grade and Compact Subsoil
Smooth and level the excavated soil, then use a hand tamper or plate compactor to create a firm, stable base.
Install Protective Underlayment
Roll out a geotextile underlayment fabric over the entire excavated area to cushion and protect the pond liner.
Place and Secure Pond Liner
Drape the flexible pond liner over the underlayment, pressing it into the contours of the basin and leaving ample overlap at the edges.
Add Water and Adjust Liner
Slowly fill the pond with water, smoothing out wrinkles and adjusting the liner as it settles under the weight.
Install River Rock Edging
Place river rocks around the pond's perimeter to conceal and secure the liner edges, creating a natural-looking border.
Alternative Gravel Options for Ponds
When building a pond, the choice of aggregate materials influences both functionality and aesthetics. River rock is often the top recommendation because its smooth, rounded edges protect pond liners from punctures while providing a natural appearance. Pea gravel, sand, and boulders serve specific roles in filtration, leveling, and structural support, whereas standard gravel may be too angular for direct liner contact.
Ideal for lining the pond bottom and edges to protect the liner and create a natural look.
View Product →Works well in filter beds and around plant roots for drainage and biological filtration.
View Product →Used as a cushioning base layer under the liner to prevent punctures from sharp objects.
View Product →Provides structural support for pond edges and creates naturalistic waterfalls or shelves.
View Product →Too angular for direct liner contact, risking punctures unless used with a protective layer.
View Product →Common Pond Mistakes (And How to Avoid Them)
Avoiding common pitfalls during pond construction ensures long-term stability and reduces maintenance headaches. These mistakes often compromise water retention, liner integrity, or overall aesthetics.
- Insufficient base layer
- Poor edge support
- Wrong liner protection
- Inadequate filtration setup
- Neglecting overflow drainage
How to Maintain a Pond
Regular pond maintenance involves removing debris like leaves and algae to prevent water quality issues. Inspect and clean filter media annually, and check for liner damage or sediment buildup that can affect water levels. Replenish protective gravel layers as needed to maintain liner coverage and aesthetic appeal.
Calculate How Much Gravel You Need
Enter Your Dimensions
Measure your project area and we'll calculate how much material you need.